


Servings: 8 servings
Equipment
- Dutch Oven
Ingredients
Roasted Chilis
- 2 large jalapeno peppers, sliced + deseeded + roasted
- 3 large poblano peppers, sliced + seeded + roasted
- 4 large anaheim peppers, sliced + seeded + roasted or sub 2 cans green chilis
- Extra Virgin Olive Oil, for drizzling
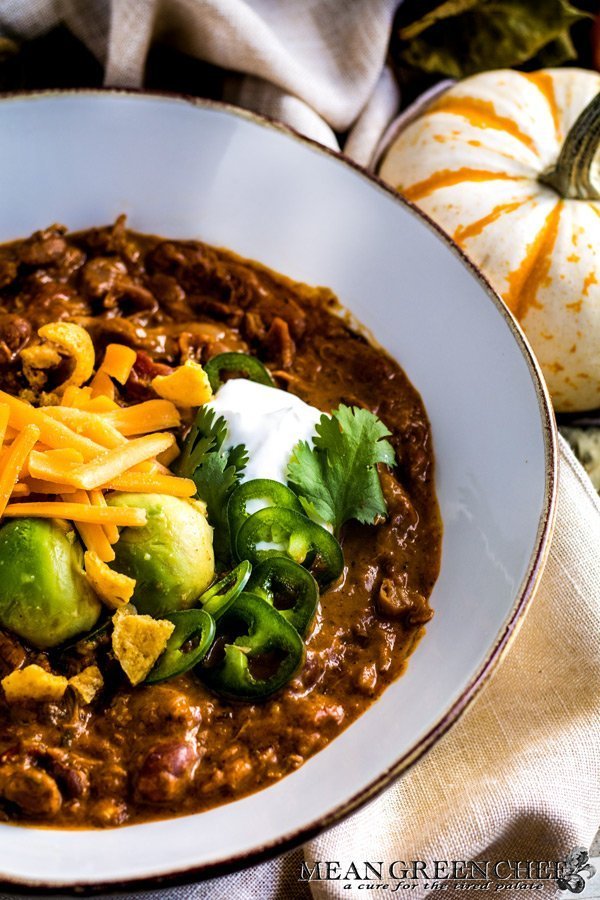
Roasted Pumpkin Chicken Chili
- 2 Tablespoons bacon fat, sub vegetable oil
- 1 large white onion, topped + skinned + diced
- 2 Tablespoons chili powder, or to taste
- 1 Tablespoon oregano, dried
- 1 teaspoon cumin, ground
- ½ teaspoon nutmeg, ground
- 2 teaspoons Kosher sea salt, coarse grind
- 4 cloves garlic, smashed + peeled + diced
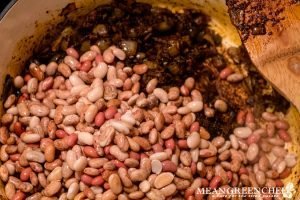
- 2 cups white beans, soaked overnight + sub 2 cans beans
- 3 cups chicken stock, sub veg stock
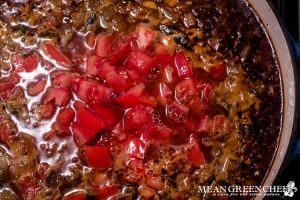
- 4 large red ripe tomatoes, washed + diced
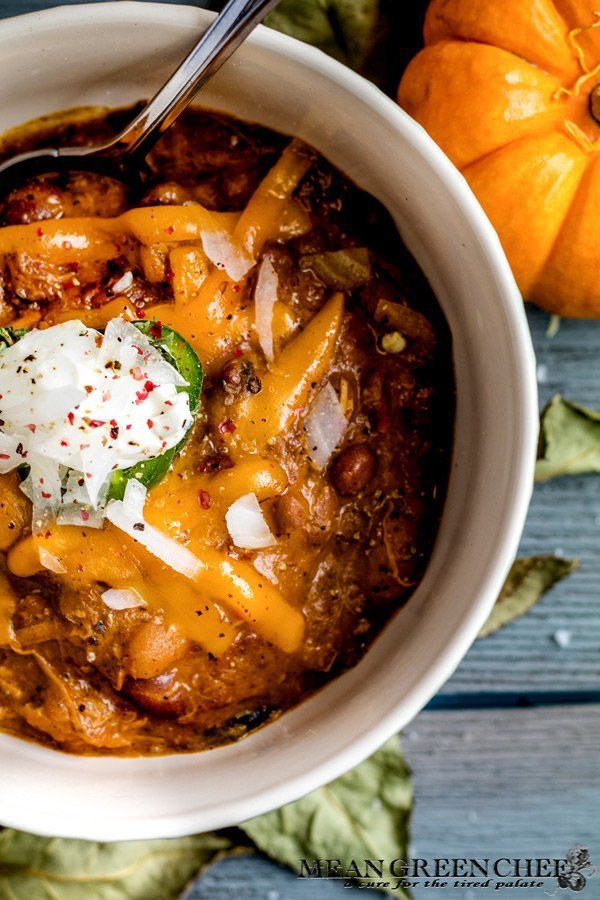
- 8 ounces (1 block) cream cheese, diced into 1-inch cubes-full fat
- 2 cups roasted pumpkin puree, sub 1 can Organic Pumpkin puree
- 3 cups shredded chicken, sub rotisserie chicken
Instructions
Roasted Chilis
- Preheat the oven to 450°F/232°C, line a baking sheet with parchment paper. Slice and deseed the jalapenos, Pabloanos, and Anaheim chili peppers. Drizzle with EVOO. Roast in the oven for approximately 20 minutes until the skin bubbles and brown spots appear. Remove, cool, and peel.


Roasted Pumpkin Chicken Chili
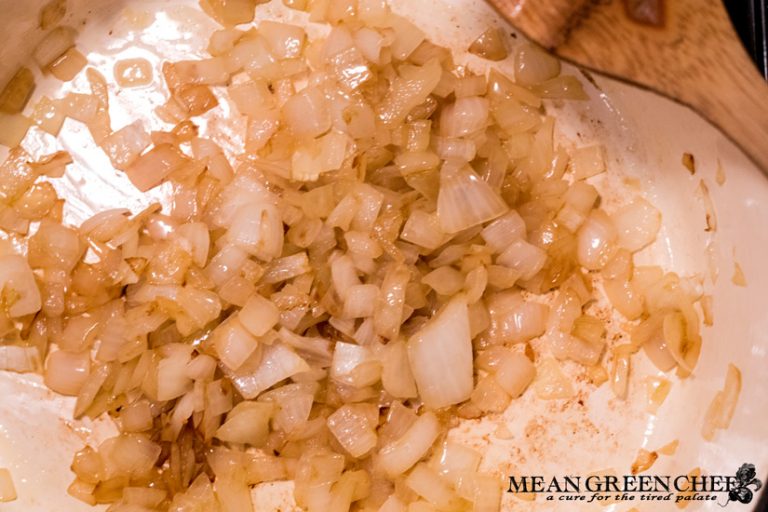
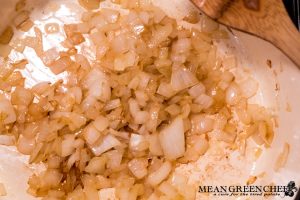
- Preheat a heavy-bottomed Dutch Oven over medium-high heat. Add the bacon fat and reheat for 30 seconds, then add the onion. Cook until golden brown and caramelized about 15 minutes.

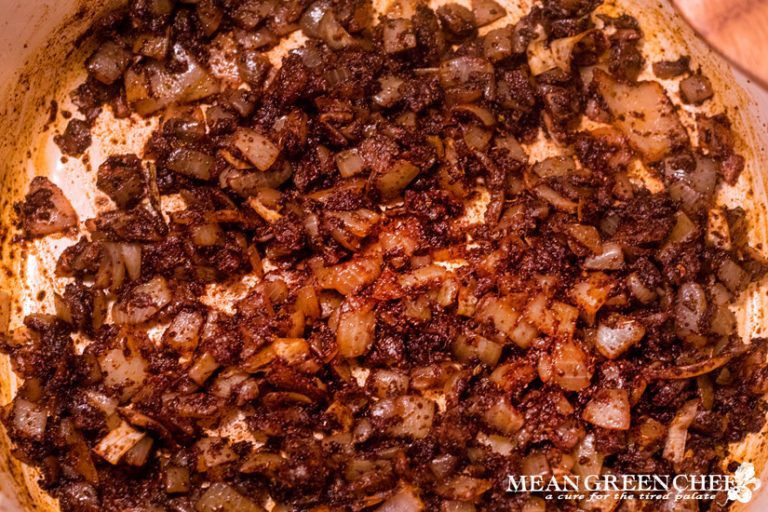
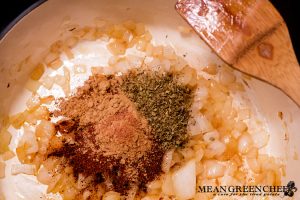
- Add the chili powder, oregano, cumin, nutmeg, and sea salt to the caramelized onions.
- Stir and cook down for 1 minute to bloom the spices and make them aromatic.
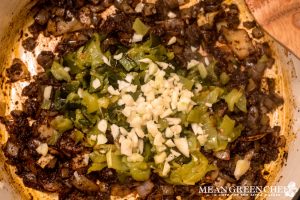
- Toss in the roasted jalapenos, poblanos, anaheim peppers, and garlic. Stir and cook for another minute until the aroma of the peppers and garlic begins to lift.
- Add the beans
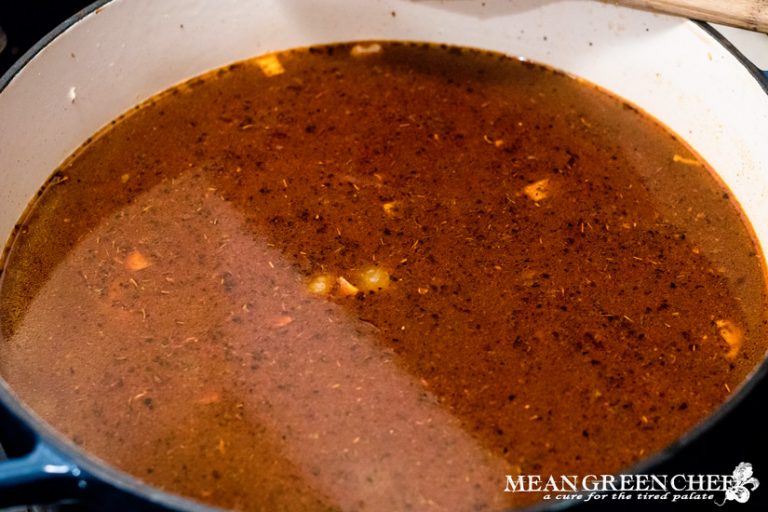
- Pour in the stock
- Add the diced tomatoes, bring back to a boil and reduce heat. Cook covered on medium-low flame for about an hour. Stirring at least every 20 minutes.
- Add the cream cheese and pumpkin then continue cooking for another 30 minutes over low heat or until beans are fully cooked through and flavor has developed. Then add the shredded chicken until heated through. Yes, the chili will taste better the next day after the flavors have fully blended.
- Serve in warm bowls with your favorite toppings


Notes
- Prep time will vary, get your ingredients in order for expident cooking!
- Using the substitue ingredients as noted will cut down prep time.
- Store in an airtight container in the fridge 3-5 days.
- Cool, divide and store in airtight containers in the freezer up to 6 months. You can pull a container out for a quick meal anytime. Warm-up on the stovetop or in the microwave until heated through.
Tried this recipe?Let us know how it was!


Pumpkin in chili sounds amazing! I also love the use of all the peppers here. Bring on the spice! 🙂
Thanks so much, Erika! It’s actually a really tame chili due to roasting the chilies which makes them milder. You can always turn up the heat with red pepper flakes or adding more chilies and their seeds too.
I absolutely LOVE chili and this recipe looks like a keeper. Can’t wait to try this one sometime during the chilly season ahead 😀
Chilly season coming on fast, Colleen! Thanks so much for visiting and be sure to let us know how your version turns out! 🙂
I love your Chef’s Tip – it so true you have to use all your senses when cooking.
It’s 100% true, Harriet and needed with every single dish it’s how people learn to cook on their own. Thank you for stopping by 🙂
Chili is among my favorite meals at any time, but adding pumpkin can only add it to the next level. The colors are just gorgeous, too (as always). I’ve never been confident that the beans would cook completely when added uncooked, as you have here, and always parboil in addition to long soaking. Maybe I need to be more adventurous. 😉
Get your adventure on Beth! A nice long presoak overnight (no salt) and a bit of baking soda make for a bean that’s ready to cook. They’re easily done within 2 hours and most are perfect in about 6-90 minutes. Low and slow, even cooking results in beans that have a nice tooth and are not mush. Thank you so much for your compliments and for visiting us as always 🙂
This was so delicious! My family loved it and my husband even wants to have some for breakfast. Definitely adding this to my fall menu lineup!
Wonderful, Tricia! So glad that your family loved it and thank you so much for taking the time to share a photo and the darling video of your grandson eating too. You made my day 🙂
All I want right now is a bowl of this chili with some moist cornbread! Looks so delicious!!
Thanks so much, Ai! Yes! Warm cornbread with a schmear of butter 😛
Thanks, I pinned this for later!
Great, thanks Diane!
This chili looks and sounds fabulous! I love that you roast all the peppers beforehand. Roasting really makes them more flavourful and sweeter!
Roasting really does make everything taste so much better, Jacqueline! It also mellows the heat for folks who like a tamer chili 🙂
This sounds like a perfect & delicious comfort food for the Fall season! I just made some cornbread, so I may have to give this a try!
Great, thanks so much, Simone! Please be sure to share your recipe creation with us when you make it 🙂
I always soak the dried beans overnight, old habits inherited from my grandparents. This roasted pumpkin chicken chili sounds so amazing:). I’m definitely making it a bit later in Fall on a cooler weekend. The pictures look fabulous and the step by step are so clear to follow.
Hi, Sonila! Soaked beans are so much better than canned they hold a nice bite and don’t get mushy or dissolve. Please be sure to share your results with us when you whip up a batch, thanks so much for visiting 🙂
This recipe sounds perfect for the weather we have. I love how beautifully you explained the recipe and the chef tips which is indeed useful.
So glad that the tips are helpful too, Lathiya! We appreciate your visiting and checking out our recipe 🙂
I love that you are using whole pumpkin here instead of just opening the can. I make chili with sweet potatoes all the time but will have to give this a try!
Real pumpkin really makes a difference, Kari! 🙂