How to Make a Lattice Pie Crust

18
Please Share the Goodness!

Have you ever wondered How to Make a Lattice Pie Crust? It may look intricate, but it’s actually quite easy! Check out our step by step process for this beautiful pie presentation!

The lattice pie crust has a centuries-old history originating in traditional European baking. Introduced in medieval times, it served both practical and decorative purposes, allowing steam to escape during baking while adding an artistic touch to homemade pies. Over time, it became a cherished tradition in various cuisines worldwide, including American colonial baking. Today, lattice pie crusts remain beloved for their practical benefits and timeless beauty, adorning a variety of sweet and savory dishes with rustic charm and craftsmanship.

This function of venting allows the steam to escape from the bubbling hot fruit filling. The lattice crust creates the perfect vents and ensures you don’t have a disaster in the making.

How to Weave a Lattice Pie Crust

If you want to make a lattice pie, you first need to start with the crust. In this tutorial, we’re using a double batch of our Easy Shortcrust Pastry to create a bottom and top crust. This pastry stands up the weight of the apples in our Caramel Apple Pie (also pictured).

  • Make sure to keep your pie pastry cold while you work with it—it’s key! That means you’ve got to move quickly.
  • If you find the pastry becoming too soft, don’t stress! Simply pause and return it to the fridge or freezer to firm up again. This ensures your crust stays wonderfully tender and flaky.

Roll out half of your dough for the bottom crust, creating a circle about 3 inches larger than your pie dish. Gently place it in the dish and press it lightly to fit, letting any extra dough hang over the sides. Trim off the excess and press down to ensure the crust is snugly in place.

Bottom of a pie crust formed into a 9 inch pie dish, photographed on a parchment paper background with a white kitchen linen running up the left side. Mean Green Chef

Next up: cutting the strips for the pie’s top. No pastry wheel? No problem! A pizza wheel works just as well. And if you’re without both, a sharp knife and straight edge ruler will do the trick. Slice the pastry into even strips, ranging from 1/2 to 3/4 inches wide, depending on your desired lattice thickness.

Sliced pastry dough, cut for making a lattice pie crust. Mean Green Chef

Once your pie is filled, arrange 4-7 parallel strips of pastry dough (depending on their thickness) on top of the filling, leaving approximately 1/2 to 3/4 inch of space between each strip.

Overhead photo of Lattice Pie Crust being created over a caramel apple pie, photographed on a parchment paper background. Mean Green Chef

Then fold back every other strip.

Overhead photo of Lattice Pie Crust being created over a caramel apple pie, photographed on a parchment paper background. Mean Green Chef

Position a strip of dough perpendicular to the parallel strips, then unfold the folded strips over the perpendicular one as illustrated.

Overhead photo of Lattice Pie Crust being created over a caramel apple pie, photographed on a parchment paper background. Mean Green Chef

Next, fold back the parallel strips that are beneath the perpendicular strip, following the visual guide below. Place a second perpendicular strip of dough adjacent to the first one, leaving some space between them. Then unfold the folded parallel strips over the second strip.

Overhead photo of Lattice Pie Crust being created over a caramel apple pie, photographed on a parchment paper background. Mean Green Chef

Keep it up, you’re almost done! Repeat these steps until the lattice covers the entire top of the pie.

Trim the edges of the strips to align with the pastry of the pie dish, then crimp and firmly secure them to the shell.

Overhead photo of Lattice Pie Crust being created over a caramel apple pie, photographed on a parchment paper background. Mean Green Chef

Our pie here was coated and glazed with caramel sauce to make our Caramel Apple Pie, lending it a rich golden hue. Alternatively, if you’re baking a different pie, use an egg wash for a lovely color. To make an egg wash, simply beat an egg with a tablespoon of milk or cream to slightly thin it out.

If your pie becomes too brown as it bakes (typically an issue on the outer edges) just add a rim of foil around the rim of the pie. Which allows the rest of the pie to become perfectly golden.

Please Pin to Make & Share!📌

Slice of Caramel Apple Pie garnished with whipped cream and dripping in caramel

How to Make Short Crust Pastry

Easy Shortcrust Pastry

Our Easy Shortcrust Pastry (called pâte brisée in French) can be utilized for so many different dishes, from sweet to savory! Did we mention it's ultra-easy? It is, in less than 10 minutes your pastry dough will be chilling in the fridge.  
Prep Time: 10 minutes
Chill Time: 30 minutes
Prep Time: 10 minutes
Chill Time: 30 minutes
Servings: 292 grams

Ingredients

  • 1 ample cup (145 grams) all-purpose flour
  • 1/2 teaspoon Kosher sea salt finely ground
  • 1/2 cup 1 stick (120 grams) butter FROZEN unsalted
  • 2-4 Tablespoons water ICE COLD

Instructions

Pastry

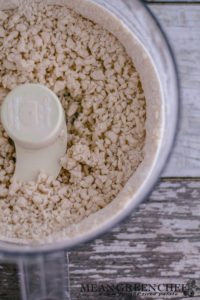
  • Put flour and salt in the bowl of a food processor. Add frozen butter and quickly blitz the flour mixture until it resembles a coarse meal.
    Easy Shortcrust Pastry blitzed in food processor.
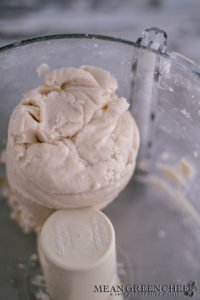
  • Add ice water a tablespoon at a time and blitz briefly, about 30 seconds, to form a soft dough.
    Shortcrust pastry being blitzed in the food processor.
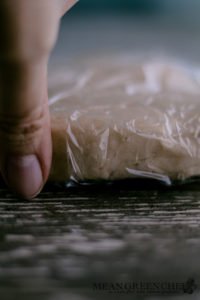
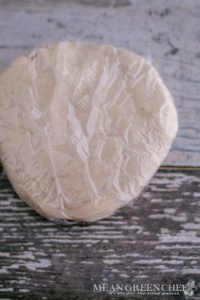
  • Remove dough, shape into a thick disk, wrap in plastic and refrigerate for at least 2 hours or overnight. Bring to cool room temperature before rolling.
    Easy Shortcrust Pastry in plastic wrap for chilling showing depth dough.

Rolling

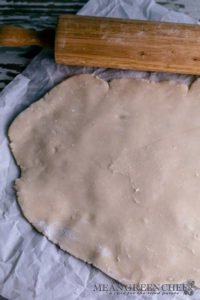
  • Once the dough has chilled at least 30 minutes, remove it from the fridge and let rest for 5 minutes.
    Easy Shortcrust Pastry ready for chilling.
  • Lightly flour dough and counter, roll out gradually, periodically letting dough rest for a moment before continuing. This makes rolling easier and will keep dough from shrinking back during baking.
    Easy Shortcrust Pastry with rolling pin.

Notes

  • Prep time is approximate.
  • Shortcrust Pastry can be made a day ahead, just be sure to wrap it tightly in plastic wrap and leave i chilling in the fridge. 
Tried this recipe?Let us know how it was!

Creative Recipe Inspiration

Indulge in the cozy flavors of autumn with our Rustic Pumpkin Pie. This classic seasonal treat boasts a buttery, flaky crust filled with a velvety-smooth pumpkin filling infused with warm spices like cinnamon, nutmeg, and cloves.

Savor the comforting warmth of home-cooked goodness with our Double Crust Chicken Pot Pie. Tender chunks of chicken and hearty vegetables nestled in a rich, creamy sauce, all encased in a flaky, golden crust—this classic dish is the epitome of comfort food.

Step Into My Kitchen!

Hey there, fellow food enthusiast! Welcome to Mean Green Chef, where every dish tells a story and every recipe is a labor of love. I’m thrilled to share a bit about myself and the journey that led me here, stirring pots and sprinkling spices for over three decades!

Let’s Cook Together!

* indicates required

Just a quick heads up – you might notice some affiliate links sprinkled throughout our site. If you decide to click on them and make a purchase, rest assured, it won’t cost you extra. Instead, you’ll be helping to support our blog and keep the kitchen fires burning. Thanks a bunch for your support!

    Please Share the Goodness!

    Leave a Reply

    Your email address will not be published. Required fields are marked *

    Recipe Rating


    This site uses Akismet to reduce spam. Learn how your comment data is processed.

    Close
    Mean Green Chef © Copyright 2024. All rights reserved.
    Close
    Verified by MonsterInsights