How to Make Sugared Fruit

346
Please Share the Goodness!

Looking to glam up a dessert or centerpiece? We’ll show you How to Make Sugared Fruit in a couple of easy steps. Sugar dipped fruit is the perfect embellishment for cupcakes, cakes, and so much more!

Many recipes call for the use of pasteurized egg whites, or meringue powder. However, we utilize a simple syrup to coat these plump berries and then roll them in superfine sugar.

Blackberry sitting in a white bowl with superfine sugar and a silver spoon to the left.

Tip: You can find superfine sugar in the baking aisle, in a smaller sized canister.

Side photo of Pink Champagne Cupcakes with Raspberry Buttercream
  1. Strawberries
  2. Grapes
  3. Blueberries
  4. Raspberries
  5. Blackberries
  6. Cherries
  7. Citrus slices (lemons, oranges, limes)
  8. Pineapple chunks
  9. Kiwi slices
  10. Apple wedges

Let your creativity flow! In our Pink Champagne Cupcakes, we opted for raspberries and blackberries, which disappeared quickly! Traditionally, you’ll find grapes, figs, pears, gooseberries, and roses used. As the sugar coating dries, it creates a crispy outer layer.

Important Note: Avoid refrigerating sugared fruits as they may become moist, causing the sugar to dissolve and spoil the desired effect.

Sugared coated fruit is so easy to make, the only thing you’ll have to plan for is the drying time. These take a total of 2 hours to dry (1 hour for the simple syrup to adhere and become tacky and 1 hour for the freshly rolled sugar to dry). However, the longer they dry the prettier they become!

Create a beautiful centerpiece for a party, use grapes, apples, and perfect pears.

Please Pin to Make & Share!📌

Side photo of Pink Champagne Cupcakes with Raspberry Buttercream

Sweet Preservation: Storing Sugared Fruit

Sugared fruit, with its crystallized coating adding sweetness and texture, can be stored to maintain its quality. Here’s how:

  1. Cooling: Allow the sugared fruit to cool to room temperature after coating. This helps the sugar to set and adhere properly to the fruit.

  2. Drying: Place the sugared fruit on a parchment-lined baking sheet in a single layer. Let it air dry for a few hours or overnight. This step helps to further set the sugar coating and remove excess moisture.

  3. Storage Container: Once the sugared fruit is dry, transfer it to an airtight container for storage. Use containers that are clean and dry to prevent moisture from affecting the texture of the fruit.

  4. Layering: If storing multiple layers of sugared fruit, place parchment paper or wax paper between the layers to prevent sticking and preserve the texture of the coating.

  5. Cool, Dry Location: Store the container of sugared fruit in a cool, dry place away from direct sunlight and heat. Exposure to moisture or warmth can cause the sugar-coating to soften and become sticky.

Shelf Life: When stored properly in an airtight container in a cool, dry place, sugared fruit can last roughly a week. However, the texture and appearance of the sugar-coating may degrade over time, so it’s best to consume sugared fruit within a few days for the best quality.

By following these storage guidelines, you can enjoy the delightful sweetness and crunch of sugared fruit for longer periods, whether as a tasty snack or a decorative addition to desserts and baked goods.

How to Make Sugared Fruit

Sugared Blackberries and raspberries drying on a baking rack.

Sugared Fruit

Sugar dipped fruit is the perfect embellishment for cupcakes, cakes, and so much more! Plus, it's super easy to make and contains no eggs. 
Prep Time: 10 minutes
Cook Time: 5 minutes
Resting time total: 2 hours
Total Time: 15 minutes
Prep Time: 10 minutes
Cook Time: 5 minutes
Resting time total: 2 hours
Total Time: 15 minutes
Servings: 3 cups
Author: Mean Green Chef

Ingredients

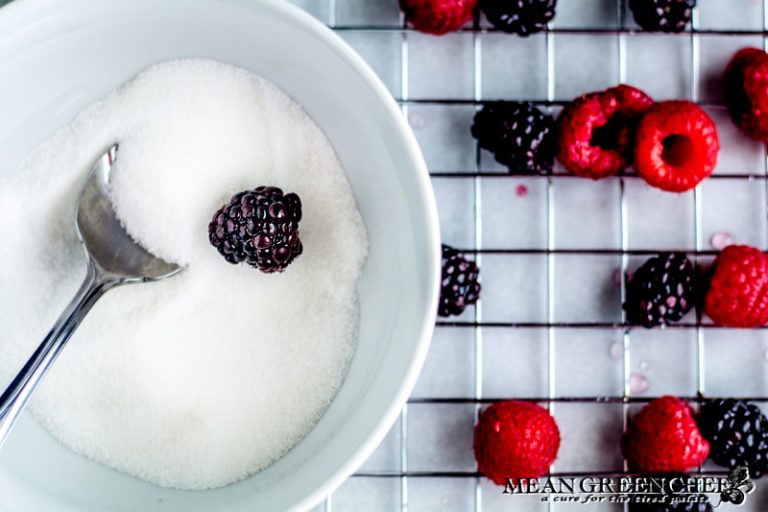
  • 3 cups raspberries, blackberries or other fruit
  • 1/2 cup (120 ml) water
  • 1 cup (200 grams) superfine sugar, divided in half

Instructions

  • Add 1/2 of the sugar and water to a heavy-bottomed saucepan. Stirring continuously over medium-high heat until the sugar melts.
    Small blue pot with melted sugar for making sugared fruit.
  • Gently add the raspberries, blackberries or other choices of fruit, being sure that they are covered on all sides. 
    Raspberries and Blackberries taking a dip in a sugar water bath for sugared fruit.
  • Using a slotted spoon remove the fruit to a wire rack over a sheet pan or large piece of parchment paper. Making sure that the fruit does not touch and allow to sit for 1 hour undisturbed. 
    Sugared Blackberries and raspberries drying on a baking rack.
  • After one hour has passed, pour the remaining 1/2 cup of sugar into a bowl. Take the fruit and roll one piece at a time in the sugar. 
    Blackberry sitting in a white bowl with superfine sugar and a silver spoon to the left.
  • As each piece is rolled, place it back on the rack until the process is complete. Allow the fruit to sit for 1 additional hour undisturbed. 
    Sugared Blackberries and raspberries drying on a baking rack.

Notes

  • Prep time is approximate. 
  • It's best to use fruit that isn't too ripe, as it will be difficult to glaze the berries.
  • Store sugared fruit at room temperature in a non-humid environment for up to 24 hours.
  • If the fruit is stored with moisture, the sugar will dissolve into a syrup-like consistency.
Tried this recipe?Let us know how it was!

Creative Recipe Inspiration

Our Bakery Style Chocolate Cupcakes are high-top cupcakes too! Moist, delicious and and perfect for any occasion. 

Side photo of Bakery Style Chocolate Cupcake decorated with a high swirl of chocolate frosting red frosting berries and a sprinkle of silver stars in a scalloped gray cupcake wrapper.
Chocolate Storm Cake with a fork through the tender cake.

Chocolate Storm Cake is taste bud revolution! Our most popular and pinned 5-Star cake!  Chocolate Cake.

Step Into My Kitchen!

Hey there, fellow food enthusiast! Welcome to Mean Green Chef, where every dish tells a story and every recipe is a labor of love. I’m thrilled to share a bit about myself and the journey that led me here, stirring pots and sprinkling spices for over three decades!

Let’s Cook Together!

* indicates required

Just a quick heads up – you might notice some affiliate links sprinkled throughout our site. If you decide to click on them and make a purchase, rest assured, it won’t cost you extra. Instead, you’ll be helping to support our blog and keep the kitchen fires burning. Thanks a bunch for your support!

    Please Share the Goodness!

    Leave a Reply

    Your email address will not be published. Required fields are marked *

    Recipe Rating


    This site uses Akismet to reduce spam. Learn how your comment data is processed.

    Close
    Mean Green Chef © Copyright 2024. All rights reserved.
    Close
    Verified by MonsterInsights