Basic Meringue

59
Please Share the Goodness!

Meringue is a favorite in our kitchen! Whether piled high on pies, piped into dainty melt in your mouth cookies or grandstanding as a Pavlova with fresh fruit. Here are our family secrets to creating a perfect meringue from scratch. 

Basic Meringue Recipe | Mean Green Chef
Strawberry Meringue Cookies

A simple meringue consists of egg whites, sugar, and a stabilizer. Whisking or beating encourages the protein in the egg whites to unfold, creating films that capture air bubbles. The addition of a stabilizer and sugar enhances the foam’s strength and stiffness.

Egg whites and cream of tarter that have been beaten to stiff white peaks for our Basic Meringue Recipe

Ingredients:

  • 4 large egg whites, at room temperature
  • 1 cup granulated sugar
  • 1/4 teaspoon cream of tartar (optional, but recommended for stability)
  • Pinch of salt

Directions:

  1. Preparation: Ensure that your mixing bowl and beaters are clean and free of any grease, as even a small amount can prevent the egg whites from whipping properly.

  2. Separate Eggs: Carefully separate the egg whites from the yolks, making sure not to get any yolk into the whites. Even a small amount of yolk can prevent the whites from whipping to their full volume.

  3. Whip Egg Whites: In a large mixing bowl, beat the egg whites on medium speed until they become frothy. This usually takes about 1-2 minutes.

  4. Add Cream of Tartar (Optional): Once the egg whites are frothy, add the cream of tartar and continue beating until soft peaks form. The cream of tartar helps stabilize the egg whites and creates a sturdier meringue.

  5. Gradually Add Sugar: With the mixer running on medium-high speed, gradually add the granulated sugar, about 1 tablespoon at a time, until all the sugar has been incorporated. Continue beating until the meringue forms stiff, glossy peaks. This usually takes about 5-7 minutes in total.

  6. Test for Stiff Peaks: To test if the meringue is ready, stop the mixer and lift the beaters. The meringue should form stiff peaks that stand upright when the beaters are lifted.

  7. Use Immediately: Once the meringue reaches stiff peaks, it’s ready to use. Avoid overbeating, as this can cause the meringue to become dry and grainy.

Tips for Successful Meringue

  • Use fresh, room temperature eggs for the best results.
  • Make sure your mixing bowl and beaters are clean and free of grease.
  • Gradually add the sugar to ensure it fully dissolves into the egg whites.
  • Be careful not to overbeat the meringue, as it can become dry and lose its glossy appearance.
  • Store any leftover meringue in an airtight container in the refrigerator for up to 2 days.

TIP: Avoid making meringue on days when high humidity and rain are an issue. The meringue will readily absorb moisture, making it difficult to achieve thick, stiff peaks.

Recipe Variation: Swiss Meringue:

  • In a heatproof bowl, combine the egg whites and sugar.
  • Place the bowl over a pot of simmering water, making sure the bottom of the bowl doesn’t touch the water.
  • Heat the mixture, whisking constantly, until the sugar has dissolved and the mixture reaches 160°F (71°C) on a candy thermometer.
  • Remove the bowl from the heat and beat the mixture with a mixer until stiff, glossy peaks form. This method creates a stable meringue with a silky texture, perfect for piping or spreading on desserts.
Egg whites and cream of tarter in a large glass bowl for our Basic Meringue Recipe

Crisp Whites: How to Properly Separate Eggs for Meringue

Separating eggs for basic meringue is a crucial step to ensure success. Here’s how to do it properly:

  1. Prepare Ingredients: Before you begin, gather your eggs and make sure they are at room temperature. Cold eggs are more difficult to separate.

  2. Crack Eggs: Carefully crack the egg on a flat surface, such as the countertop, to avoid getting shell fragments into the egg whites.

  3. Separate Whites: Hold the cracked egg over a clean bowl, and gently transfer the yolk back and forth between the two halves of the shell, allowing the egg white to fall into the bowl below. Be careful not to break the yolk, as even a small amount of yolk can prevent the whites from whipping properly.

  4. Transfer Yolk: Once the egg white is separated, transfer the yolk to a separate bowl. You can use it for another recipe or discard it if not needed.

  5. Repeat: Continue separating the remaining eggs, transferring the whites to the bowl as you go.

  6. Inspect Egg Whites: After separating all the eggs, carefully inspect the egg whites to ensure there are no traces of yolk or shell fragments. Even a small amount can prevent the egg whites from whipping properly.

  7. Use Immediately: Once separated, use the egg whites immediately for making meringue. They can also be stored in an airtight container in the refrigerator for up to a day, but it’s best to use them as soon as possible for optimal results.

By following these steps, you can separate eggs effectively and ensure that your meringue turns out light, airy, and perfect every time.

TIP: Yolks can be used for fresh pasta, ice cream, Hollandaise sauce, Aioli and so much more. 

Easy Egg Yolk Pasta Recipe | Mean Green Chef
Easy Egg Yolk Pasta
Overhead photo of Strawberry Meringue Cookies sitting on a white plate that's placed on old blue boards and sprinkled with flower petals.
Strawberry Meringue Cookies

Add Your Heading Text Here

When whipping meringue, the type of bowl you use can affect the outcome. Here’s a little insight into the best types of bowls for whipping meringue:

  1. Copper Bowls: Traditional copper bowls are highly prized for whipping meringue because copper ions react with the egg whites, creating a more stable foam with increased volume. However, they can be expensive and require careful maintenance to prevent tarnishing.

  2. Stainless Steel Bowls: Stainless steel bowls are a popular choice for whipping meringue because they are lightweight, durable, and non-reactive. They are easy to clean and maintain, making them suitable for everyday use.

  3. Glass Bowls: Glass bowls are another good option for whipping meringue. They are non-reactive and allow you to see the consistency of the meringue as you whip it. However, glass bowls can be heavy and prone to breaking if dropped.

  4. Plastic Bowls: Plastic bowls are lightweight and inexpensive, but they are not ideal for whipping meringue. Plastic can retain grease and residue, which can inhibit the egg whites from whipping to their full volume. Additionally, plastic bowls may have a static charge that can interfere with the stability of the meringue.

  5. Ceramic Bowls: Ceramic bowls are aesthetically pleasing and come in a variety of colors and designs. While they are generally non-reactive, some ceramic glazes may contain metals or other substances that could affect the meringue. It’s best to choose a high-quality ceramic bowl that is specifically labeled as food-safe.

Stainless steel and glass bowls are the most practical and versatile choices for whipping meringue. They are non-reactive, easy to clean, and provide good results. If you’re looking for the traditional touch and have the means to maintain it, copper bowls can also be a fantastic option for achieving the perfect meringue.

Whipping Meringue: Tips for Perfect Peaks

  1. Preparation: Ensure that your mixing bowl and beaters are clean and free of any grease, as even a small amount can prevent the egg whites from whipping properly.

  2. Separate Eggs: Carefully separate the egg whites from the yolks, making sure not to get any yolk into the whites. Even a small amount of yolk can prevent the whites from whipping to their full volume.

  3. Start Slow: Begin whipping the egg whites on low to medium speed until they become frothy. This usually takes about 1-2 minutes.

  4. Add Acid: For stability, add a pinch of cream of tartar or a few drops of lemon juice to the egg whites. This helps to create a more stable foam.

  5. Gradually Add Sugar: With the mixer running on medium-high speed, gradually add the granulated sugar, about 1 tablespoon at a time, until all the sugar has been incorporated. This helps to ensure that the sugar dissolves evenly into the egg whites.

  6. Whip to Stiff Peaks: Continue beating the egg whites until stiff, glossy peaks form. To test if the meringue is ready, stop the mixer and lift the beaters. The meringue should form stiff peaks that stand upright when the beaters are lifted.

  7. Use Immediately: Once the meringue reaches stiff peaks, it’s ready to use. Avoid overbeating, as this can cause the meringue to become dry and grainy.

  8. Store Properly: If you’re not using the meringue immediately, store it in an airtight container in the refrigerator for up to a day. Be sure to use it as soon as possible for the best results.

By following these steps, you can whip meringue to perfection every time, achieving light and airy peaks that are perfect for topping pies, cakes, and other desserts.

Egg whites and cream of tarter that have been beaten to stiff white peaks for our Basic Meringue Recipe

Storing Meringue: Tips for Safekeeping

After whipping up a batch of meringue, it’s essential to store it properly to maintain its texture and flavor. Here’s how:

  1. Airtight Container: Transfer the meringue to an airtight container to protect it from moisture and odors in the refrigerator. Choose a container with a tight-sealing lid to keep the meringue fresh.

  2. Avoid Moisture: Moisture is the enemy of meringue, so be sure to store it in a dry environment away from any sources of moisture, such as the refrigerator door or near the sink.

  3. Shelf Life: Meringue stored in the refrigerator can last for up to 2 days. However, it’s best to use it as soon as possible for optimal texture and flavor. Meringue is prone to absorbing moisture from the air, so it may become soft and lose its crispness over time.

  4. Freezing: If you need to store meringue for a longer period, you can freeze it in an airtight container for up to 1 month. Thaw frozen meringue in the refrigerator overnight before using it.

  5. Reheating: If your meringue becomes soft or sticky after storage, you can refresh it by placing it in a low oven (around 200°F or 93°C) for 10-15 minutes. This will help to re-crisp the meringue without melting it.

By following these tips, you can safely store meringue and extend its shelf life while preserving its delicate texture and flavor.

Types of Meringue: Exploring Varieties and Uses

  1. French Meringue: Description: French meringue is the most basic type, made by whipping egg whites with sugar until stiff peaks form. It is used as a topping for pies, cakes, and desserts, as well as a base for meringue cookies and pavlovas. French meringue is light and airy, with a soft texture and delicate sweetness. It is not cooked before being added to desserts, so it retains a slightly soft consistency.

  2. Italian Meringue: Description: Italian meringue is made by whipping hot sugar syrup into egg whites until stiff peaks form. It is often used in recipes that require a stable meringue, such as mousses, buttercreams, and baked Alaska. Italian meringue is dense, glossy, and stable, with a marshmallow-like texture. The addition of hot sugar syrup cooks the egg whites, making it safe to eat without further cooking.

  3. Swiss Meringue: Description: Swiss meringue is made by gently heating egg whites and sugar over a double boiler until the sugar dissolves, then whipping the mixture until stiff peaks form. It is commonly used as a topping for pies, tarts, and desserts, as well as a base for buttercream frosting. Swiss meringue is smooth, silky, and stable, with a soft texture and subtle sweetness. The gentle heating process pasteurizes the egg whites, making it safe to eat without further cooking.

Please Pin to Make & Share!📌

Egg whites and cream of tarter that have been beaten to stiff white peaks for our Basic Meringue Recipe

How to Make Meringue

Egg whites and cream of tarter that have been beaten to stiff white peaks for our Basic Meringue Recipe

Basic Meringue

Meringue is a favorite in our kitchen, whether piled high on pies, piped into dainty melt in your mouth cookies or grandstanding as a Pavlova with fresh fruit. Here are our family secrets to creating a perfect meringue from scratch.
Prep Time: 15 minutes
Cook Time: 2 hours
Total Time: 2 hours 15 minutes
Prep Time: 15 minutes
Cook Time: 2 hours
Total Time: 2 hours 15 minutes
Servings: 48 small cookies
Author: Mean Green Chef

Ingredients

  • 4 large egg whites
  • 1 cup/200 grams superfine sugar
  • 1/4 teaspoon cream of tartar

Instructions

  • Preheat oven to 200°F/90°C baking time will vary depending on the size and weight of your meringue. Also, if you are using the meringue to top a pie, follow the baking directions for that specific recipe. 
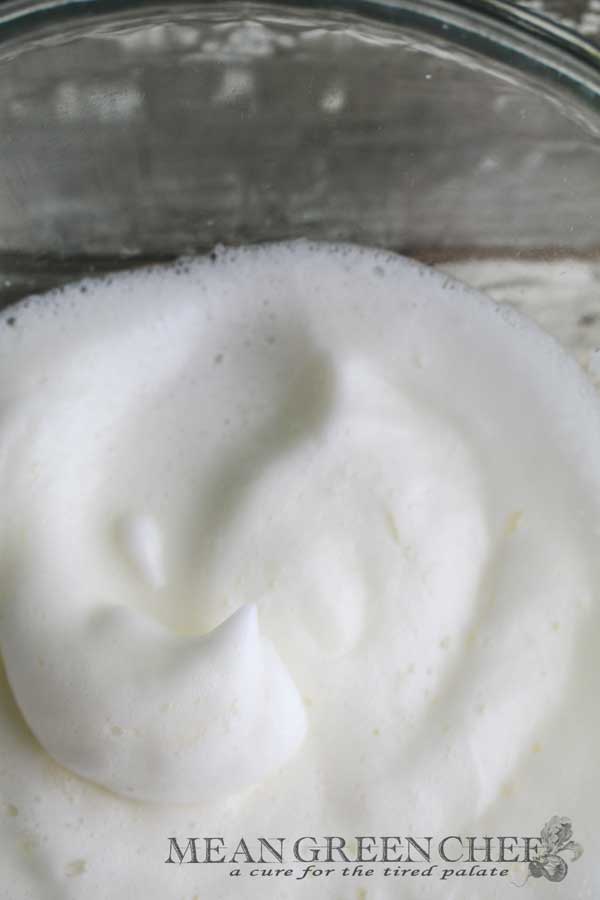
  • Be sure that your mixer bowl is clean and has no traces of grease, any residue can result in the whites not coming together. So, make sure your whisk and bowl are spotlessly clean! In a bowl of an electric mixer fitted with the whisk attachment, whisk egg whites, cream of tartar, and salt on low-medium speed until foamy and soft peaks start to form, approximately 40-50 seconds.
  • Do not add the sugar prior to whipping the egg whites. Adding the sugar at the beginning can double the time you have to whip the whites.
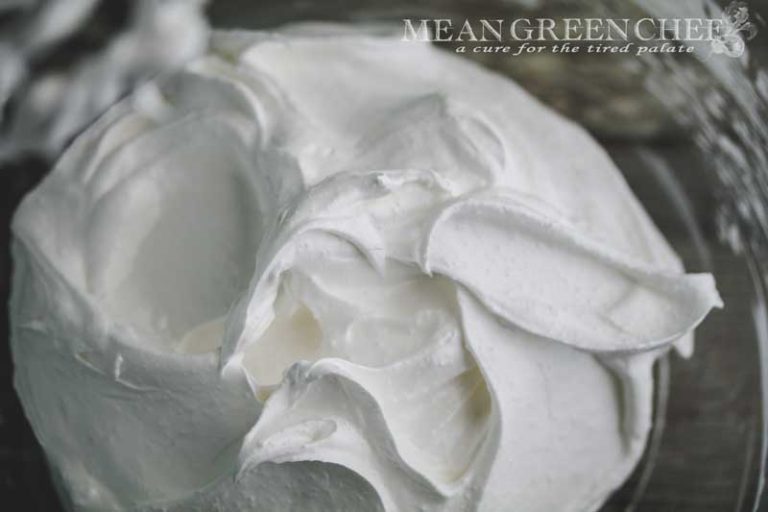
  • Then, while mixer is running, add the sugar, one tablespoon at a time, and continue whisking on medium-high speed until stiff peaks form, meringue is glossy and smooth but not dry, making sure that the sugar is fully dissolved (this process of adding the sugar and beating may take 5-10 minutes). Stop the mixer and remove the bowl. 
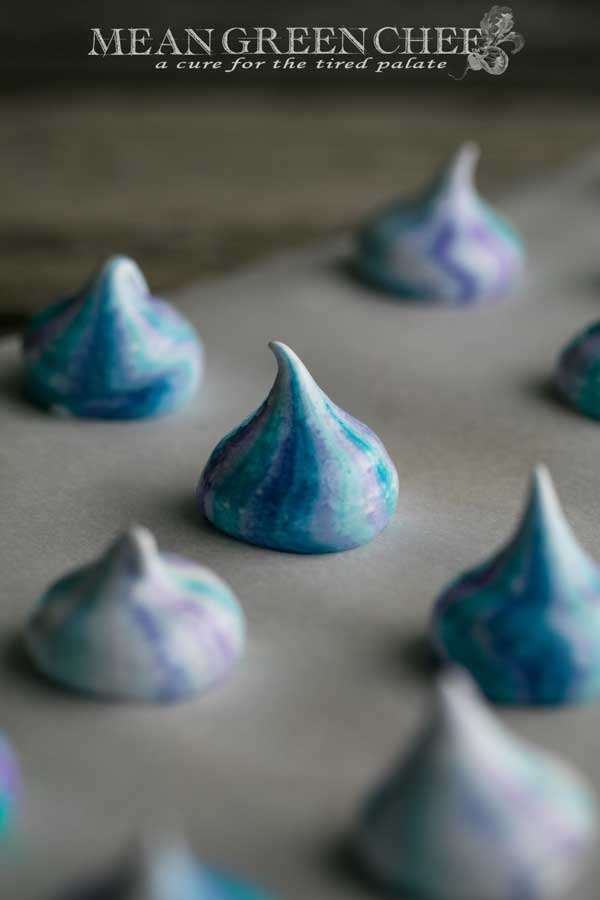
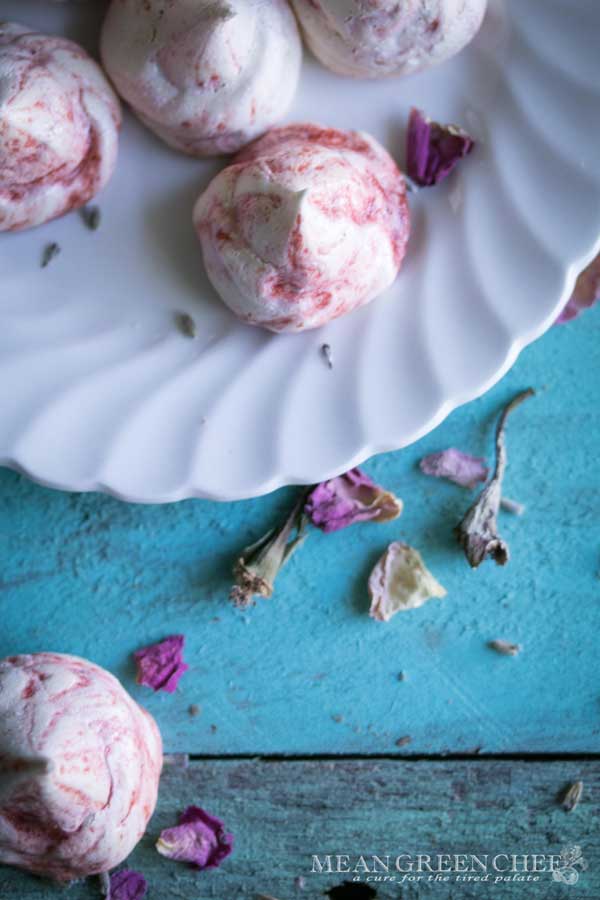
  • For the Meringue Kisses pictured here. Bake in the lower part of the oven for 2-3 hours, or until the meringues are dry, they are lifted easily from the parchment paper and their centers aren't gummy. Turn off the oven and, without removing, let meringues cool completely for at least one hour or overnight.
  • Meringue will become more done when baked at a lower temperature for a longer period of time. We typically cook ours at a temp of 200°F/90°C, time will vary depending on the size and weight of your meringue. Also, if you are using your meringue to top a pie, follow the baking directions for that specific recipe. 

Notes

  • Prep time is approximate
Tried this recipe?Let us know how it was!

Creative Recipe Inspiration

Savor the irresistible allure of our Best Ever Molasses Cookies. These delightful treats boast a perfect balance of sweetness and spice, with a soft, chewy texture that melts in your mouth.

Almond Pastry Cookies: Crisp, buttery, and delicately almond-flavored, these delightful cookies are perfect for any occasion. Enjoy the irresistible aroma and flavor of almonds in every bite!

Step Into My Kitchen!

Hey there, fellow food enthusiast! Welcome to Mean Green Chef, where every dish tells a story and every recipe is a labor of love. I’m thrilled to share a bit about myself and the journey that led me here, stirring pots and sprinkling spices for over three decades!

Let’s Cook Together!

* indicates required

Just a quick heads up – you might notice some affiliate links sprinkled throughout our site. If you decide to click on them and make a purchase, rest assured, it won’t cost you extra. Instead, you’ll be helping to support our blog and keep the kitchen fires burning. Thanks a bunch for your support!

    Please Share the Goodness!

    Leave a Reply

    Your email address will not be published. Required fields are marked *

    Recipe Rating


    This site uses Akismet to reduce spam. Learn how your comment data is processed.

    Close
    Mean Green Chef © Copyright 2024. All rights reserved.
    Close
    Verified by MonsterInsights